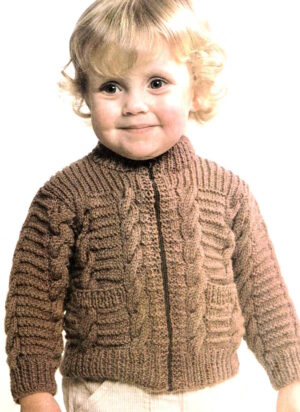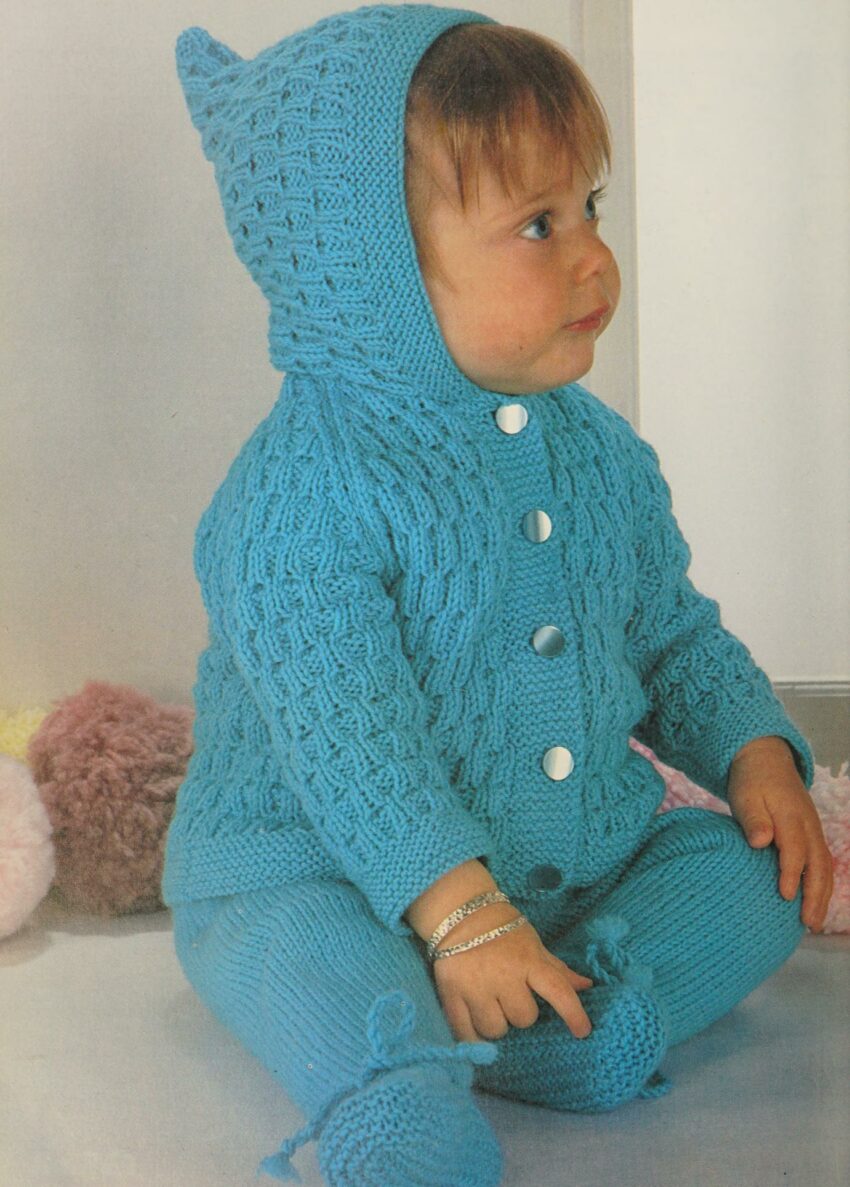
Hooded Jacket and Leggings Set – Free Baby Knitting Pattern
Create an adorable and practical outfit with this hooded jacket and leggings knitting pattern. The jacket features a unique textured stitch pattern, garter stitch bands, and a button-up front. The matching leggings have a comfortable ribbed waistband with a drawstring and shaped feet for a perfect fit. Detailed instructions and clear abbreviations make this a rewarding project for intermediate knitters. Jacket sizes to fit 18-20 inch chest; leggings waist to ankle 14.5-16 inches. (This is rewritten from a vintage knitting pattern with from the early 80’s, better formatting and additional notes added).
Materials:
- Yarn: PETER PAN Darling D.K., Wisp, or Lustre Knit.
- Jacket: 6 (7) x 20g balls.
- Leggings: 5 (6) x 20g balls.
- Needles:
- One pair 4mm needles (US size 6 / UK size 8) – Larger Needles
- One pair 3.25mm needles (US size 3 / UK size 10) – Smaller Needles
- Cable Needle: (Abbreviated as CN)
- Buttons: 5 buttons.
- Elastic: For leggings waistband.
- Stitch holders
Measurements:
- Jacket:
- To Fit Chest: 45 (50) cm / 18 (20) inches.
- Finished Chest: 51 (56) cm / 20 (22) inches.
- Length (from back of neck): 24 (28) cm / 9.5 (11) inches.
- Sleeve Seam: 15 (16.5) cm / 6 (6.5) inches.
- Hood (round face): 34.5 (37) cm / 13.5 (14.5) inches.
- Leggings:
- Waist to Ankle: 37 (40.5) cm / 14.5 (16) inches.
Jacket:
- To Fit Chest: 45 cm (18 inches): This size would likely fit a baby around 6-12 months old, possibly even a bit younger depending on the baby’s size.
- To Fit Chest: 50 cm (20 inches): This size would likely fit a baby/toddler around 12-18 months old, possibly up to 2 years for a smaller child.
- Finished Chest: 51(56) cms (20(22) ins). This allows for wearing clothes under the garment.
Leggings:
- Waist to Ankle: 37 cm (14.5 inches): This length would likely fit a baby around 6-12 months old.
- Waist to Ankle: 40.5 cm (16 inches): This length would likely fit a baby/toddler around 12-18 months old.
Summary and Key Considerations:
- Size 1 (18″ chest / 14.5″ leggings): Roughly 6-12 months.
- Size 2 (20″ chest / 16″ leggings): Roughly 12-18 months (possibly up to 2 years for a smaller child).
Crucially:
- Measure, Measure, Measure! Don’t rely solely on age. Measure the child’s chest circumference (under the arms, around the fullest part) and their waist-to-ankle length (standing up straight).
- Consider Growth: Babies and toddlers grow quickly. If the child is close to the upper end of a size range, it might be wise to knit the larger size to allow for growth.
- Ease: The finished chest measurement of the jacket is larger than the “to fit” measurement. This provides ease for comfortable movement and layering.
- Leggings Fit: Leggings are often designed to be quite fitted. If you prefer a looser fit, or if the child has particularly chunky legs, consider going up a size.
- Gauge: Correct gauge is essential.
Abbreviations:
- K: Knit
- P: Purl
- St(s): Stitch(es)
- Rep: Repeat
- Inc: Increase (knit or purl into the front and back of the same stitch)
- Beg: Beginning
- K2tog: Knit two stitches together (a decrease)
- St st: Stockinette stitch (Knit one row, Purl one row)
- Rem: Remain/Remaining
- RS: Right side
- WS: Wrong side
- CN: Cable Needle
- Sl: Slip
- Patt: Pattern
- Psso: Pass slipped stitch over
- C2F: Cable 2 Front – Slip the next st onto a cable needle and leave at the front of the work, p1, then k1 from the cable needle.
- C2B: Cable 2 Back – Slip the next st onto a cable needle and leave at the back of the work, k1, then p1 from the cable needle.
- Yf: Yarn Forward
Tension (Gauge):
- 26 sts and 36 rows = 10 cm (4 inches) measured over the pattern using the larger needles.
- 12 sts and 16 rows = 5 cm (2 inches) measured over st st using the larger needles. Gauge is crucial for correct sizing.

Jacket
Back:
- Cast On: Using the smaller needles, cast on 66 (74) sts.
- Garter Stitch: Work 12 rows in garter stitch (every row knit).
- Change to Larger Needles & Begin Pattern:
- Row 1 (RS): Knit.
- Row 2: P1, * C2F, C2B; rep from * to the last st, p1.
- Row 3: * K2, p2, k2; rep from * to end.
- Row 4: * P2, k2, p2; rep from * to end.
- Row 5: As Row 3.
- Row 6: Purl.
- Row 7: Knit.
- Row 8: P1, * C2B, C2F; rep from * to the last st, p1.
- Row 9: As Row 4.
- Row 10: As Row 3.
- Row 11: As Row 4.
- Row 12: Purl.
These 12 rows form the pattern.
- Continue in Pattern: Continue in pattern until the work measures 14 (16.5) cm / 5.5 (6.5) inches from the beginning, ending with a WS row.
- Shape Armholes:
- Keeping the pattern correct, cast off 3 sts at the beg of the next 2 rows.
- Next Row: K1, sl 1, k1, psso, pattern to the last 3 sts, k2tog, k1.
- Next Row: P2, pattern to the last 2 sts, p2.
- Rep the last 2 rows until 26 (28) sts remain, ending with a WS row.
- Cast Off: Cast off.
Left Front:
- Cast On: Using the smaller needles, cast on 30 (34) sts.
- Garter Stitch: Work 12 rows in garter stitch.
- Change to Larger Needles & Begin Pattern: Work in pattern as for the Back until the front measures the same as the back to the armholes, ending with a WS row and the same pattern row.
- Shape Armhole:
- Keeping the pattern correct, cast off 3 sts at the beg of the next row.
- Work 1 row.
- Next Row: K1, sl 1, k1, psso, pattern to end.
- Next Row: Pattern to the last 2 sts, p2.
- Rep the last 2 rows until 15 (17) sts remain, ending at the front edge.
- Shape Neck:
- Next Row: Cast off 4 sts, pattern to the last 2 sts, p2.
- Continue to dec at the armhole edge as before, at the same time dec 1 st at the neck edge on every row until 4 (5) sts remain.
- Then, continue decreasing at the armhole edge only until 2 sts remain.
- K2tog and fasten off.
Right Front:
- Cast On: Using the smaller needles, cast on 30 (34) sts.
- Garter Stitch: Work 12 rows in garter stitch.
- Change to Larger Needles & Begin Pattern: Work in pattern as for the Back until the front measures the same as the back to the armholes, ending with a RS row.
- Shape Armhole:
- Keeping the pattern correct, cast off 3 sts at the beg of the next row.
- Next Row: Pattern to the last 3 sts, k2tog, k1.
- Next Row: P2, pattern to end.
- Rep the last 2 rows until 15 (17) sts remain, ending at the front edge.
- Shape Neck:
- Next Row: Cast off 4 sts, pattern to the last 3 sts, k2tog, k1.
- Complete as for the Left Front from the neck shaping, reversing the shaping.
Sleeves (Make Two):
- Cast On: Using the smaller needles, cast on 36 sts.
- Garter Stitch: Work 12 rows in garter stitch, increasing 1 st at each end of the last row. 38 sts.
- Change to Larger Needles: Continue in pattern as for the Back, bringing extra sts into the pattern. Inc 1 st at each end of the 5th and every following 6th row until there are 46 (50) sts.
- Work Straight: Work straight until the sleeve measures 15 (16.5) cm / 6 (6.5) inches from the beginning, ending on the same pattern row as the Back at the armholes.
- Shape Top:
- Keeping the pattern correct, cast off 3 sts at the beg of the next 2 rows.
- 2nd size only: Work 2 rows in pattern.
- Both Sizes:
- Next Row: K1, sl 1, k1, psso, pattern to the last 3 sts, k2tog, k1.
- Next Row: P2, pattern to the last 2 sts, p2.
- Rep the last 2 rows until 6 sts remain, ending with a WS row.
- Cast Off: Cast off.
Hood:
- Cast On: Using the smaller needles, cast on 86 (94) sts.
- Garter Stitch: Work 12 rows in garter stitch.
- Change to Larger Needles & Begin Pattern: Continue in pattern as for the Back until the work measures 13.5 (16) cm / 5.25 (6.25) inches from the beginning, ending with a WS row.
- Cast Off: Cast off 10 (11) sts at the beg of the next 6 rows. Cast off the remaining stitches.
Finishing and Bands:
- Press Pieces: Press the pieces gently, following any yarn care instructions.
- Join Seams: Pin the sleeves into position using backstitch. Join the side seams and sleeve seams.
- Button Band:
- Using the smaller needles, cast on 8 sts.
- Continue in garter stitch until the band is long enough, when slightly stretched, to fit up the front to the beginning of the neck shaping.
- Cast off.
- Mark Button Positions: Mark positions for the buttons on the button band: the first one 1 cm (0.4 inches) from the cast-on edge, the last one 1 cm (0.4 inches) from the cast-off edge, and 3 more equally spaced between.
- Buttonhole Band:
- Work as for the Button Band, but work buttonholes to correspond with the positions marked for the buttons:
- Buttonhole Row: K3, cast off 2 sts, knit to end.
- Next Row: K3, cast on 2 sts, knit to end.
- Work as for the Button Band, but work buttonholes to correspond with the positions marked for the buttons:
- Sew Bands: Sew the bands in place.
- Join Hood: Fold the hood in half and join the cast-off edges using backstitch.
- Attach Hood: Pin the hood into position around the neck, starting at the center stitch on the front band. Sew on using backstitch.
- Press Seams: Press the seams.
- Sew on Buttons: Sew on the buttons.
Leggings
Right Leg:
- Cast On: Using the smaller needles, cast on 53 (59) sts.
- Ribbing:
- Row 1: * K1, p1, k1; rep from * to end.
- Row 2: * P1, k1, p1; rep from * to end.
- Rep Row 1 once more.
- Make Holes: * Rib 2, yf, k2tog; rep from * to the last 1 (3) sts, rib 1 (3).
- Work Straight: Work 4 rows straight in rib as established.
- Change to Larger Needles: Work 2 rows in st st, starting with a knit row.
- Shape Back (Short Rows):
- Row 1: K6, turn.
- Row 2: Sl 1, purl to end.
- Row 3: K12, turn.
- Row 4: Sl 1, purl to end.
- Continue in this way, working 6 sts more on each turn until the row “K24 (30), turn” has been worked.
- Next Row: Sl 1, purl to end.
- Continue in St st: Continue in st st, working across all sts. Increase 1 st at the beg of the next and every following 6th row until there are 60 (66) sts.
- Work Straight: Work straight until the work measures 17 (18.5) cm / 6.75 (7.25) inches from the beginning, measured at the short end, ending with a purl row.
- Increase for Gusset: Inc 1 st at each end of the next 3 rows. Cast on 2 sts at the beg of the next row. 68 (74) sts.
- Work Even: Work 2 rows.
- Shape Leg: K2tog at each end of the next and every following alt row until 58 (64) sts remain, then on every following 4th row until 40 (44) sts remain.
- Work Straight: Work straight until the work measures 39.5 (43) cm / 15.5 (17) inches from the beginning, measured down the center, ending with a knit row.
- Decrease Row: * P1, p2tog, p1; rep from * to end. 30 (33) sts.
- Change to Smaller Needles.
- Make Holes: * K1, yf, k2tog; rep from * to end.
- Next Row: Purl.
- Shape Instep (Short Rows):
- Next Row: K20 (22), turn.
- Next Row: K10 (11), turn.
- Continue in garter st on these 10 (11) sts for 22 (24) rows. Break the yarn.
- Pick Up Stitches: With the RS facing, pick up and knit 10 (11) sts up the right side of the instep, k10 (11) sts from the needle, pick up and knit 10 (11) sts down the left side of the instep, and knit the remaining 10 (11) sts. 50 (55) sts.
- Garter Stitch: Work 7 rows in garter stitch.
- Shape Sole:
- Row 1: K1, sl 1, k1, psso, k17 (19), k2tog, k6 (7), sl 1, k1, psso, k17 (19), k2tog, k1. 46 (51) sts.
- Row 2: Knit.
- Row 3: K1, sl 1, k1, psso, k16 (18), k2tog, k4(5), sl 1, k1, psso, k16(18), k2tog, k1. 42(47) sts.
- Rep the last 2 rows 4 times more, decreasing 1 st at end of last row. 34(39) sts.
Cast off.
Left Leg:
- Cast On and Rib: Using the smaller needles, cast on 53 (59) sts and work as for the Right Leg from the beginning to the end of the initial ribbing and hole-making rows.
- Change to Larger Needles:
- Next Row: Knit.
- Shape Back (Short Rows):
- Next Row: P6, turn.
- Next Row: Sl 1, knit to end.
- Next Row: P12, turn.
- Next Row: Sl 1, knit to end.
- Continue in this way, working 6 sts more before each turn until the row “P24 (30), turn” has been worked.
- Next Row: Sl 1, knit to end.
- Next Row: Purl.
- Continue and Complete: Complete as for the Right Leg, reversing the shaping for the increases (increasing at the end of the row instead of the beginning).
To Finish:
- Press Pieces: Press the pieces gently, following any yarn care instructions.
- Join Seams: Join the seams.
- Waistband Elastic: Thread elastic through the holes at the waist and sew the ends together securely.
- Ties (Make 2): Using 3 strands of yarn 1.5 meters (59 inches) long, make twisted cords. Thread the cords through the holes at the ankles. Knot and fray the ends.
- Press Seams: Press the seams.